Group study rooms
Need a space to work in a group? Book a group study room in the Library to help your collaboration.
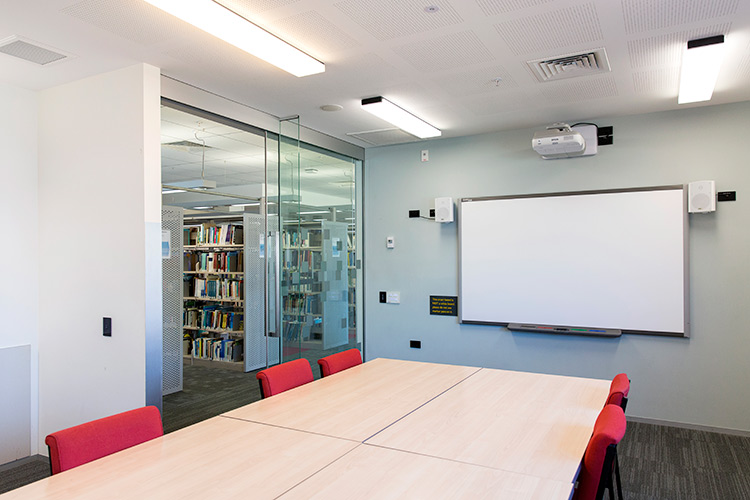
There are 10 group study rooms in the Robertson Library and they can be booked online. All room contain a whiteboard (pens not supplied), and some contain AV equipment to watch DVDs and others a Datashow.
Need to connect to a projector? Here's how
Get started by making a one-off online access request
Being able to book the Robertson Library group rooms requires access to the new (in 2022) Uni online booking system (Resource Booker). Once the request is made it takes about 15 minutes to process and then you can book the group rooms online at Robertson Library with your student email as the username and your Network password.
Please note: Resource Booker prefers using the Chrome browser.
Steps to making the one-off request to access Resource Booker
Make your one-off request through Resource Booker
- Sign in as prompted with your Otago Polytechnic student email address and network password (the same one you use to access Moodle)
IT Support Service Desk
H Block, level 1, Room H107
- Review and accept the permissions information to access Resource Booker, as shown in the screenshot below. Tick to accept permissions.
-
Once the submission is complete, wait for an email notifying you of access to Resource Booker. It can take up to 15 minutes to receive this notification.
-
Once notified, you can book group rooms in the Robertson Library online using the following instructions on this page. Please note, you will be asked asked for additional security information for the two-factor authentication the first time you use book a room.
Book a group study room online
Once you have completed the one off request process to access Resource Booker (above), you can make your room booking:
Here's how to book:
-
Click the link above and sign in with your student email (NOT your username). You will then be redirected to the OP sign-in page. Use your OP username and password to sign in
- If it is the first time you have made a booking you’ll be asked for additional security information to set up the two-factor authentication. The easiest and fastest method is to enter your mobile number. You will then receive a txt message including a code to enter into the system.
- Once you have successfully entered the code, you will be redirected to the Resource Booker dashboard. Please note: You may be asked to authenticate your login each time you access Resource Booker, depending on the computer and browser you are using.
-
On the dashboard, choose ‘Book a Robertson Library Group Study Room’
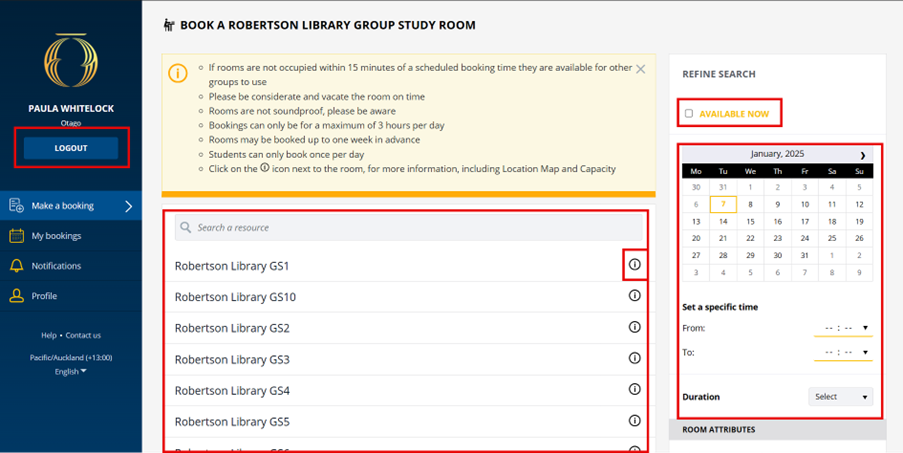
- The following scheduling screen in Resource Booker will display. Booking policies are listed at the top and rooms available are listed below.
-
You can filter the search for rooms by date required, room attributes (equipment) and capacity. These options run down the right side on the screen (indicated below). ). If you are looking for the rooms currently available, select ‘Available now’ above the calendar.
-
Clicking on the Info icon will provides room capacity information
-
Clicking on a room name will take you through to its scheduling calendar.
-
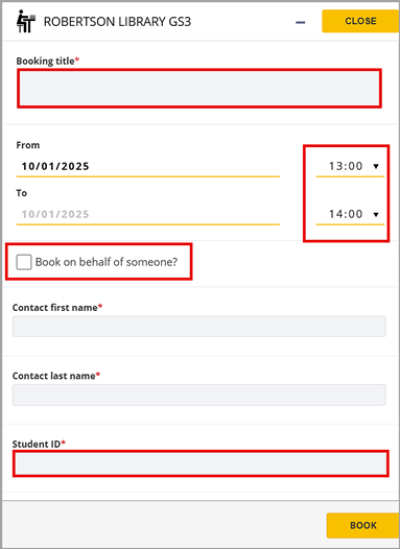
Choose/click the day/time required, fill in the required booking details shown in the screenshot below, then submit/Book to save the booking. You can also select the ‘Book on behalf of someone else’ option and add the email address of anyone else you would like to get a copy of the booking.
-
An email confirmation of your booking will be sent to your student account.
- To check or manage your room bookings, sign in to Resource Booker and choose ‘My bookings’ from the menu on the left
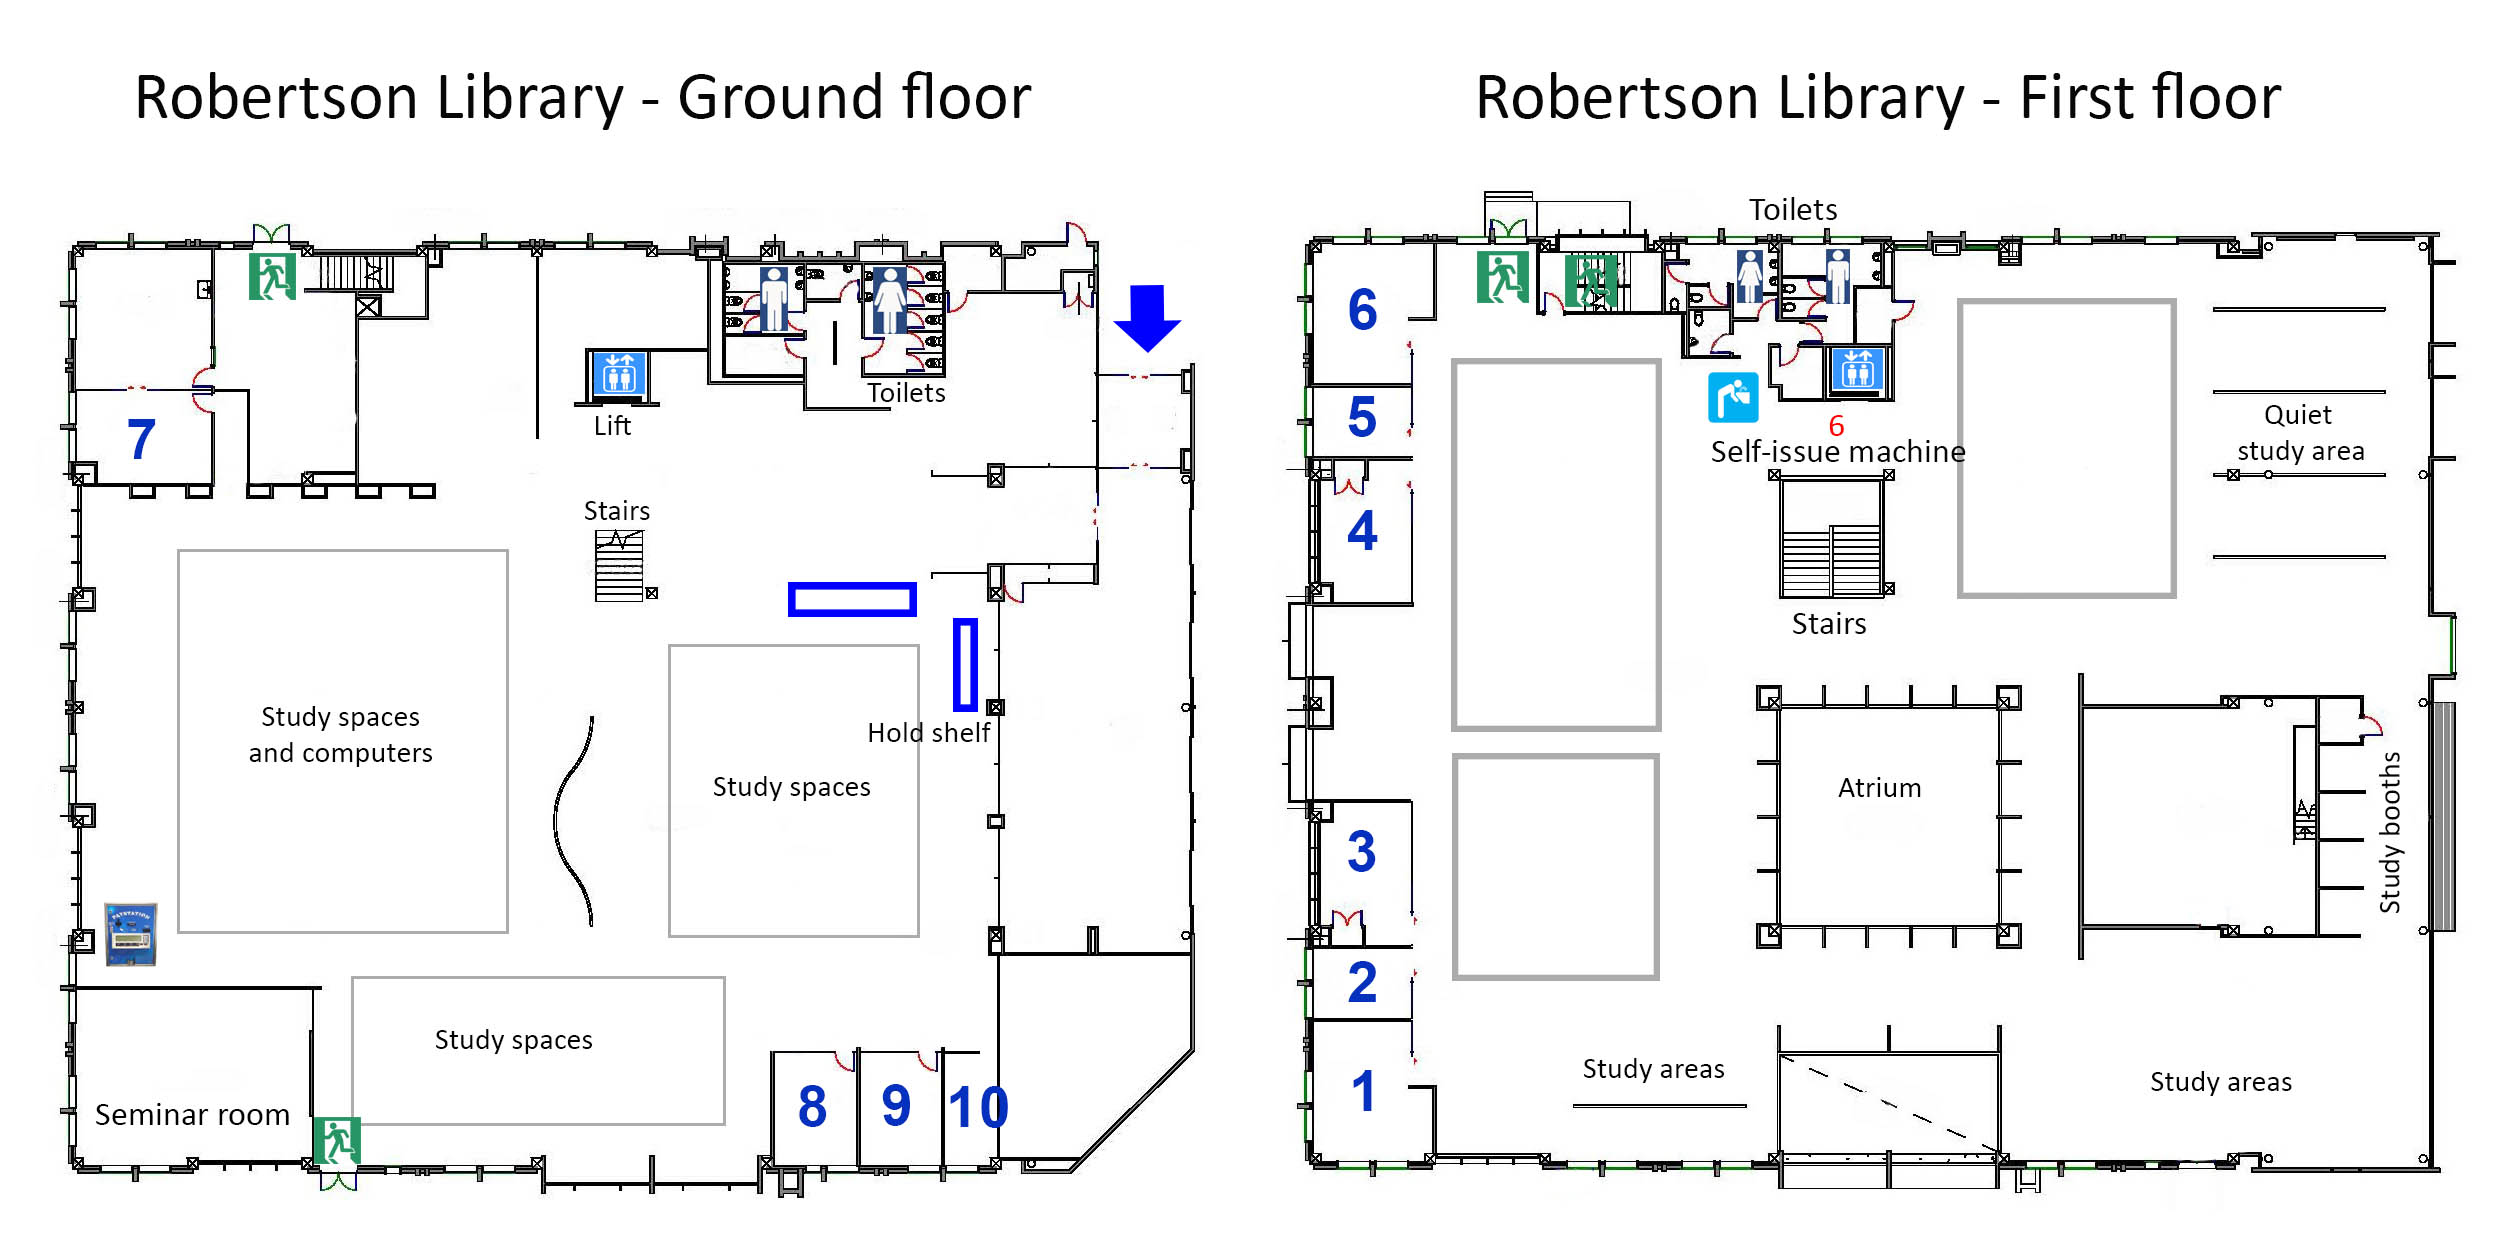
The study room numbers are shown in the map below (add GS in front).
Room Guidelines:
-
Bookings can be made up to 7 days in advance.
-
A room can be booked up to 3 hours per group, per day
-
These rooms are not soundproof - excessive noise will affect other library users
-
Rooms not occupied within 15 minutes of a scheduled booking become available for other groups to use.
-
Please be considerate and vacate the room on time.
-
Study room numbers are indicated in blue in the map above.
How to connect a laptop to the projector
To connect your laptop to the projector in the group study rooms you need a VGA cable, adaptors, and the remote for the projector. These are available in kits held in the Reserve collection – borrow them as you would a book using the self-checkout machine. Remember to Return them using the self-checkout machine as well.
The VGA cable (with attached audio cable) and the remote control for the projector are outlined in green below.
Follow these steps:
1. While your laptop is turned off, plug one end of the VGA cable into the laptop port and the other end into the port in the room. The VGA ports in the rooms are either in the floor (under the tables) or on the wall near the SMARTboard. If you want audio played through the speakers in the room, plug in the audio cable as well (attached to the Datashow cable).
This is what a VGA port on a computer looks like:
2. Use the remote to turn on the projector; the big red button at the top left.
3. Turn on your laptop.
If the laptop screen isn’t projecting through the projector you probably need to share your screen.
Hold down the Windows icon and the ‘P’ key on your keyboard. This should bring up the options for sharing your screen. Press the ‘P’ key to move to the Duplicate option. Your laptop screen may go blank for a few seconds while the view is changed.
Attributions
SVGA computer port image. Duncan Lithgow. Image retrieved from: https://commons.wikimedia.org/wiki/File:SVGA_port.jpg Licenced in the Public Domain.