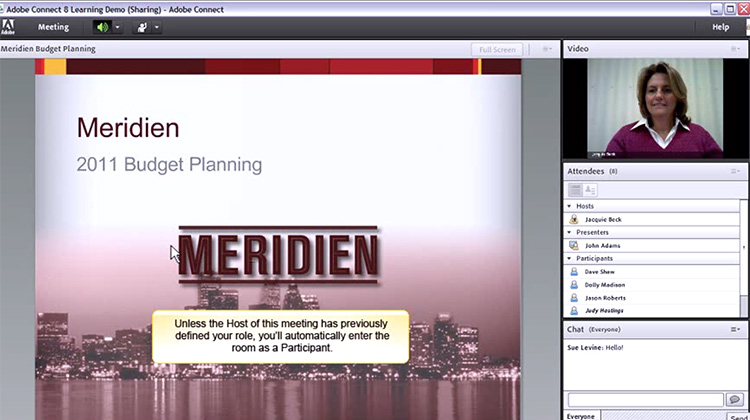
Adobe Connect
This web conferencing software, used by OP, allows online meetings for group collaborations and seminars. This page will take you through the steps needed to get ready before you access your first meeting.
Headsets
If you don’t own a headset already you will need to purchase a headphone and microphone set to use Adobe Connect. If you attempt to use the microphone from your laptop then the session experiences high levels of feedback and often the microphone does not work. This is distracting and frustrating for the other members in the group - you will not experience it.
You can usually purchase these for around $30-$50 from a technology retailer.
There are numerous varieties of USB headsets, some having microphones, which normally work without any configuration. If your device does not detect the headset you may need to reset the USB port. To reset the USB port you have to power down your device and remove the power cord or battery for approximately one minute. Replace the power cord or battery and power up the machine and then reconnect your headset.
Volumn
Some headsets have a volume controller built in that works by either clicking + or - or by turning a wheel. Some indicate volume is muted by a red LED light. Set this volume to mid-range as it is easily adjusted when using the headset.
Windows sound device settings
Before you access your first meeting follow the next steps to ensure that your sound device settings are correct.
1. Plug your USB headset in.
2. Click Start/Windows
3. Type Sound, and click on Sound Settings
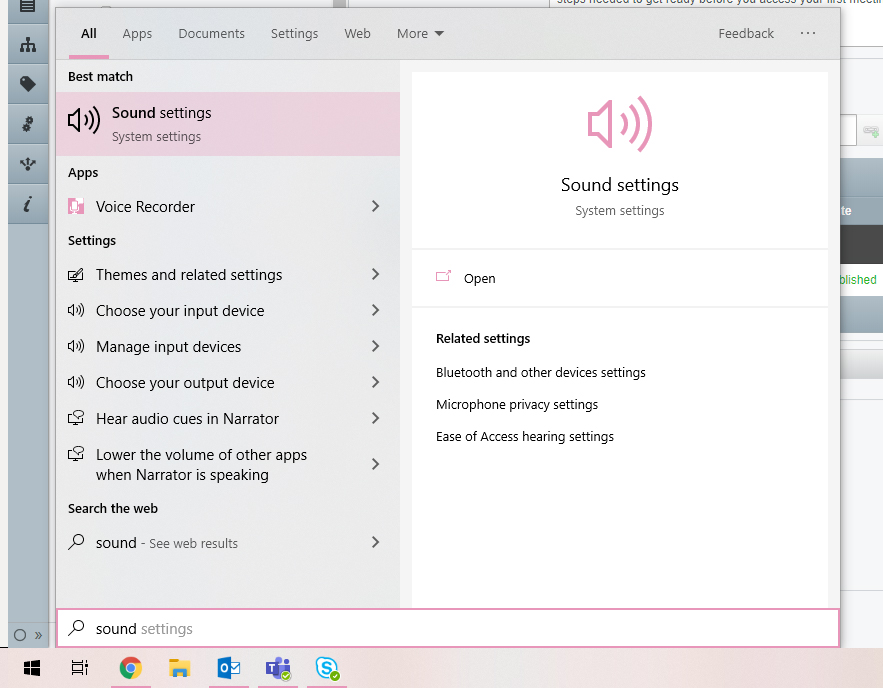
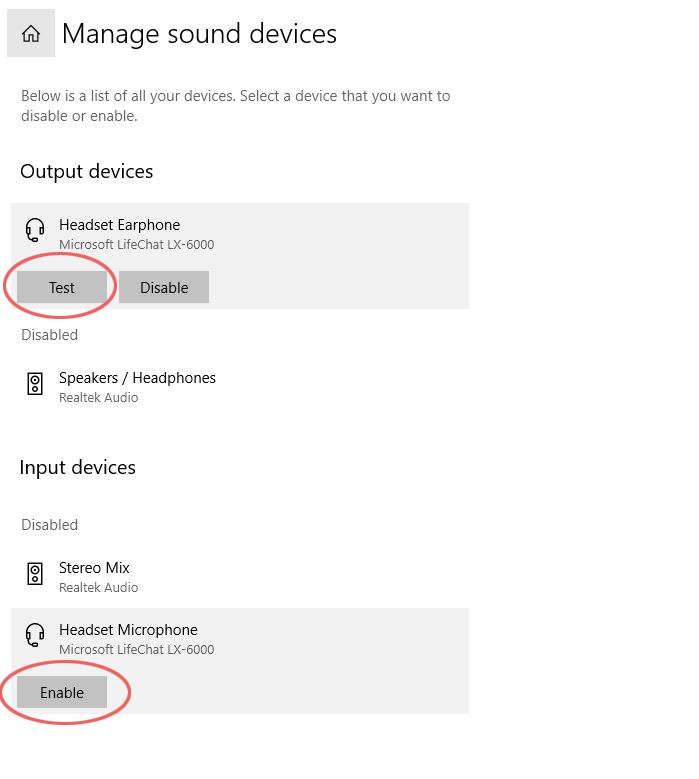
3. Click Manage Sound Devices:
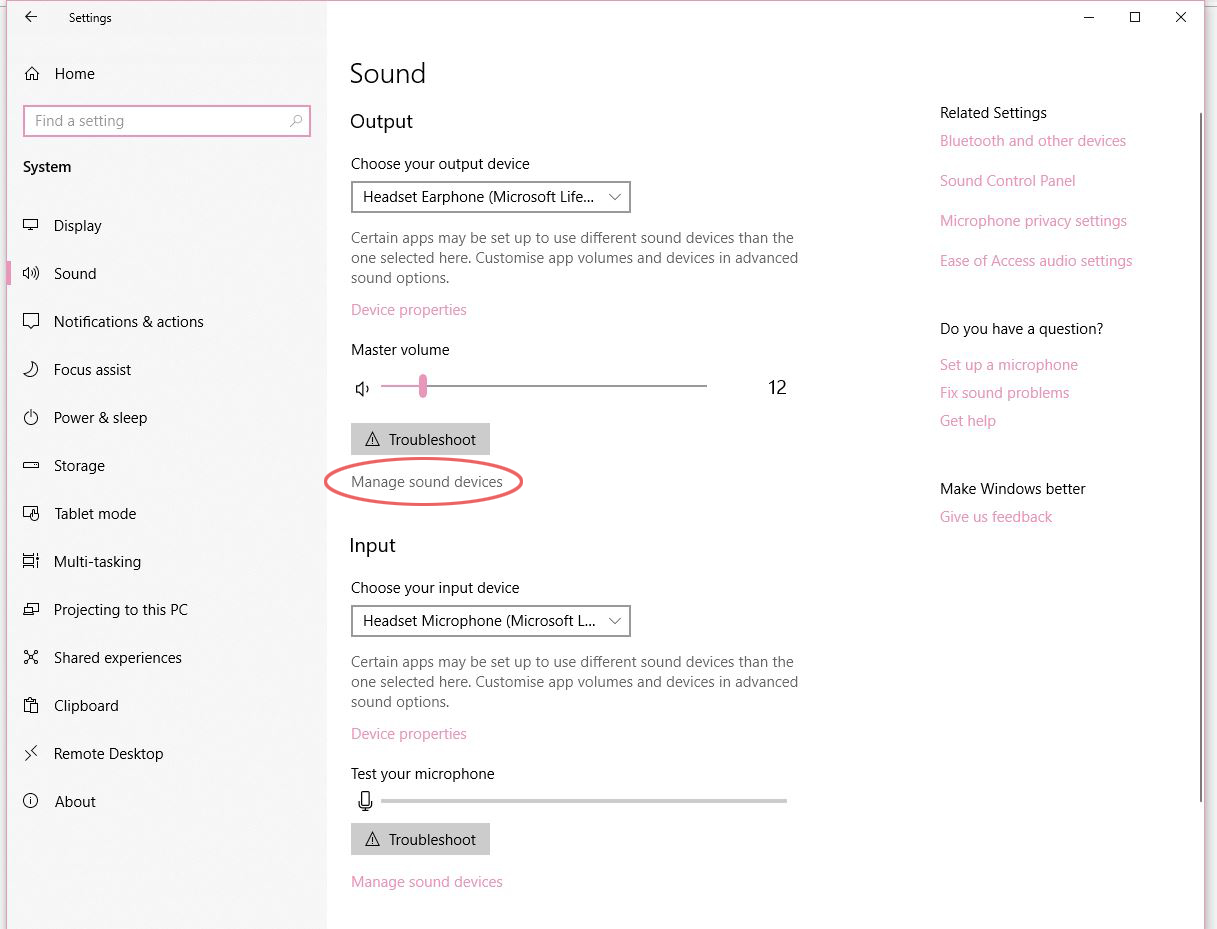
4. Ensure that your headset is enabled.
5. You can click on Test to test the functionality of the device.
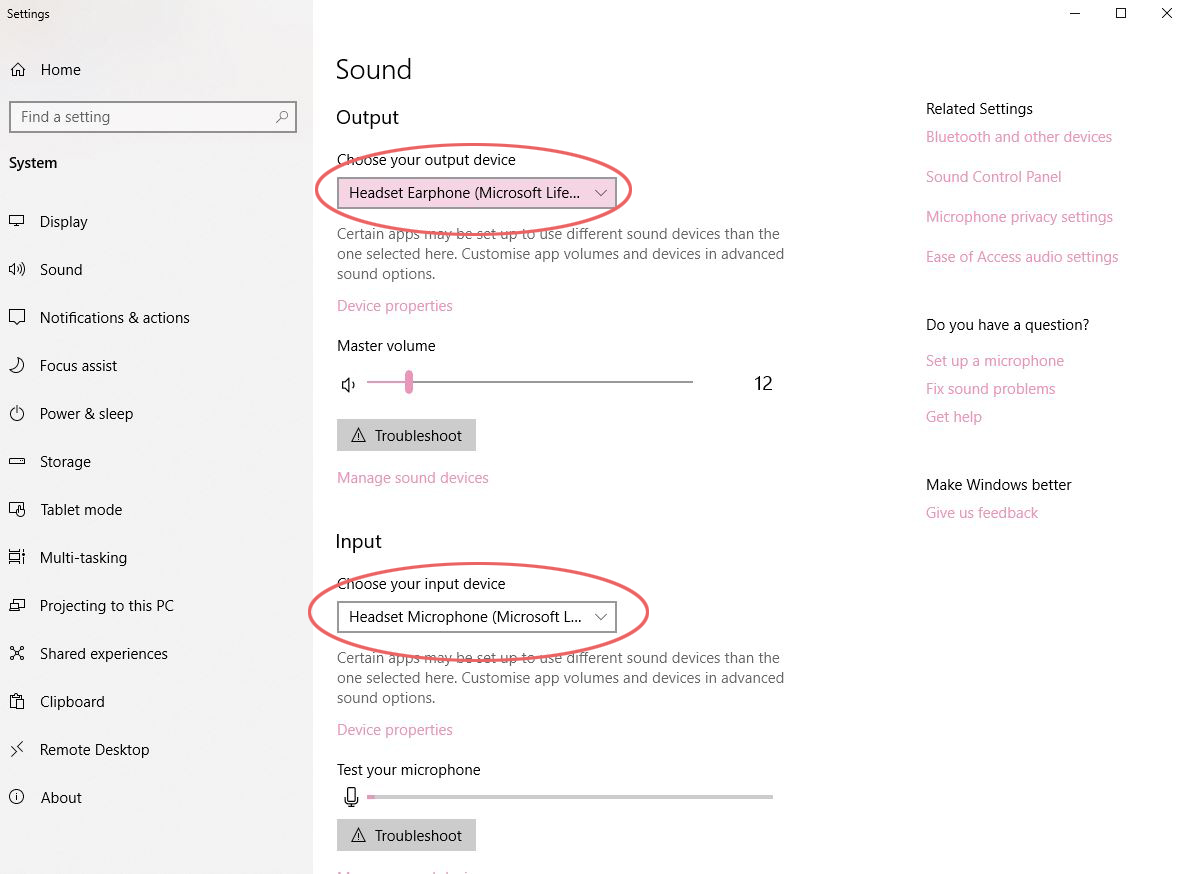
6. In the previous screen, select your headset as the output and input devices.
Accessing your first meeting
Adobe Connect is a web based programme. To access a meeting you need a link or invitation to participate. Prior to accessing your first meeting on Adobe Connect, please work your way through the following steps:
Test your connection
-
Run this Adobe Connect Connection Test
-
This will ensure you have the correct version of Adobe Flash on your computer to run Adobe Connect.
-
If needed, install the latest version of Flash Player.
- Follow the instructions for the Add-in if instructed.
Access your meeting
-
Ensure you have plugged in your headset before you open a meeting. This is important to ensure they will work during a meeting.
-
If you have been sent a link to a meeting, click on this now to access the meeting.
- You can also login using your student username and password to adobeconnect.op.ac to see a list of your meetings.
-
Once the meeting host accepts you into the meeting, the meeting room interface appears.
Set up your Audio
On entering the meeting, ensure your sound is working by clicking on Meeting and then run the Audio Setup Wizard.

During the audio setup testing you also may get a small pop-up window from the Flash Player like this:

If so, click on Allow.
To stop this occurring you can right-click in the middle of the screen and select Settings. Then click Allow and click the Remember checkbox and Close.
If you have any issues with your headphones/microphone or both during this setup, please check the Audio troubleshooting section below for more information.
Once you're all set up and the audio setup wizard has finished you should see the main Adobe Connect Meeting session.
![]()
-
Click on the Microphone icon and select Connect My Audio (it will turn green to indicate it is on). Once your Microphone icon is green you should be able to communicate with others in the classroom, so say hello to the meeting host if a session is running.
-
If people are having difficulty hearing you then use the Adjust Mic Volume options by clicking on the drop down arrow next to the Microphone icon.
-
Always make sure your Microphone icon is green before you start talking. You can use the Mute My Mic option as well if you aren’t going to be talking for a while. This will stop any background noises from your location transmitting into the chat whilst you are not contributing. Just remember to un-mute before you start talking again.
Change your status
Within a meeting, you can also change your status to provide feedback to the presenter and other attendees.
To change your status, click the arrow on the Status Options dropdown list on the Application Bar and select your desired status option.

If you select an option above the line such as Agree or Step Away, you status remains until you choose Clear Status. If you choose an option below the line such as Speed Up or Applause, your status automatically clears itself after a number of seconds.
When you set your status, an icon appears next to your name in the Attendees pod.
Chat
To send a message to everyone, simply type your message in the chat pod and hit enter or click the send icon.
If the meeting host has enabled private chat, you can send messages to a specific attendee or group within the meeting. To do this, use the Attendees pod to hover over the name of the attendee you’d like to chat with, and select
Start Private Chat. Alternatively, you can use the Pod Options menu in the top right hand corner of the pod to select an individual or group by clicking Start Chat With.
Private chat messages show up in additional tabs to make it easy to distinguish between private and public chat.
If the host is using a Q&A pod instead of a Chat pod, then all messages are moderated and private chat is not available.
Audio troubleshooting
If you still have any issues with your headphones or microphone, after completing the Audio Setup Wizard, try these troubleshooting solutions:
- Ensure your headset is plugged into your computer correctly.
- If you are using the web browser Chrome this could cause issues with your audio. Try using another web browser such as Firefox or Safari.
Headphones
If you cannot hear the music playing in Step 1 of the Audio Setup Wizard:
- Ensure your speakers are connected and turned on.
- Ensure the volume is set to an audible level and that mute is not ticked.
- To check this, double-click on the Audio icon.
![]()
- You can also check that the correct device is selected by right-clicking on the Audio icon and select Adjust Audio Properties.
- Click on the Audio tab and select the device you have from the drop down if it’s not showing already. Uncheck Use only default devices.
Microphone
If you cannot record your voice in Step 2 of the Audio Setup Wizard:
-
Ensure you select your microphone - this should correspond to the device you have plugged in. You may need to pick the current microphone from the drop down list.
-
Ensure the Line In and Microphone volume is set to an audible level and that mute is not ticked.
- To check this, double-click on the Audio icon.
![]()
- If the Line In or Microphone options are not available, select Options > Properties and ensure volume controls are showing for each (in either Playback or recording)
-
As above, you can also check that the correct device is selected by right-clicking on the Audio icon and select Adjust Audio Properties.
- Click on the Voice tab and check that the default voice recording and playback correspond also to the device you have plugged in.
Attributions
Hero image: Christmas tree light blur. mirekmurmir. Image retrieved from: https://pixabay.com/en/christmas-tree-light-blur-boketh-1226220/ Licensed under Creative Commons License CC0 Public Domain.


